


21 Apr How to use a glue gun?
胶枪在生活中的应用,相信大家都不陌生,比如房子的门漏水,用胶枪密封胶,漏水问题就解决了,今天我就来介绍一下胶水的具体使用方法一步步拿枪!

方法/步骤
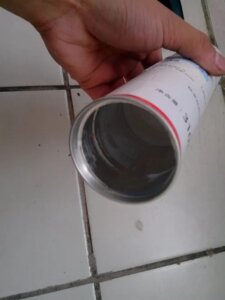
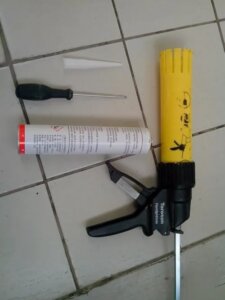
1.准备好工具和设备:一把螺丝刀、一瓶密封剂和一把胶枪。

2.用螺丝刀将密封胶尖轻轻插入小口中,使密封胶流出。
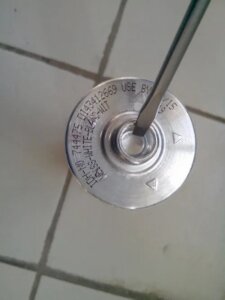
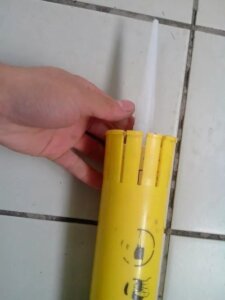
3.用一字螺丝刀将密封胶橡胶尾部的小铁盖插入一个小口,然后轻轻取下小盖,如图2所示。

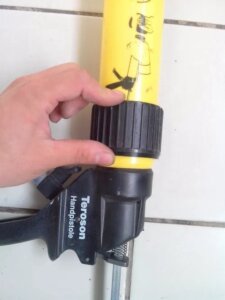
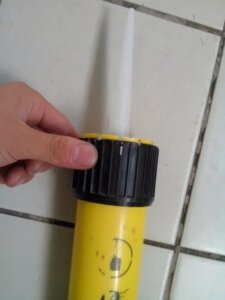
4.通过密封剂头上的螺纹,将喷嘴在密封剂头上顺时针旋转。

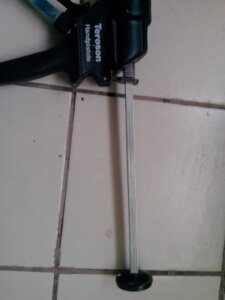
5.将胶枪的黑色固定环置于胶枪的最末端,以便密封剂能顺利插入胶枪。
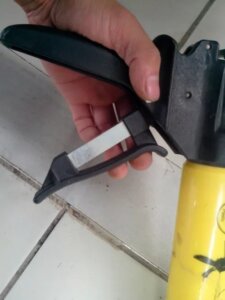
6.一手按住胶枪小弹簧,另一只手将胶枪延长臂调整到最大。这样做的目的是为了让密封胶能够全部进入胶枪内部。
7.将胶枪从尾部一点一点地插入,当只露出胶尖时,说明整个密封胶已插入胶枪中。

8.将胶枪黑色固定环套在胶枪头上。这样做的目的是为了将密封胶固定在胶枪内部,防止胶枪使用过程中密封胶从胶枪中逸出。

9.再次按住胶枪末端的小弹簧,用另一只手将胶枪的伸出臂向前推,直到推不动为止。

10.按住胶枪开关,让密封胶从胶嘴流出!请注意不要按下胶枪的开关,轻轻一点一点地按下,这样密封胶就会均匀地流出!
[/vc_column_text][/vc_column][/vc_row]
The application of the glue gun in life, I believe that everyone is no stranger, such as the door leak of the house, with the glue gun sealant, the water leakage problem will be solved, today I will introduce the specific use of the glue gun step by step!
Methods/Steps
1.Get your tools and equipment, a screwdriver, a bottle of sealant, and a glue gun.
2.Use a screwdriver to gently insert the sealant tip into a small opening so that the sealant can flow out.
3.Insert a small opening into the small iron cover of the rubber tail of the sealant with a word screwdriver, and then gently remove the small cover, as shown in Figure 2.
4. Through the thread of the sealant head, twist the nozzle clockwise on the sealant head.
5.Place the black fixing ring of the glue gun at the very end of the glue gun, so that the sealant can be inserted into the glue gun smoothly.
6.One hand holds down the small spring of the glue gun, and the other hand adjusts the extension arm of the glue gun to the maximum. The purpose of doing this is to make the sealant can all enter the inside of the glue gun.
7.Insert the glue gun from the tail, bit by bit, and when only the glue tip is exposed, it means that the entire sealant has been inserted into the glue gun.
8.Put the black fixing ring of the glue gun on the head of the glue gun. The purpose of doing this is to fix the sealant inside the glue gun and prevent the sealant from escaping the glue gun during the use of the glue gun.
8.Put the black fixing ring of the glue gun on the head of the glue gun. The purpose of doing this is to fix the sealant inside the glue gun and prevent the sealant from escaping the glue gun during the use of the glue gun.
9.Hold down the small spring at the end of the glue gun again, and push the extended arm of the glue gun forward with your other hand until you can’t push it anymore.
10.Press and hold the switch of the glue gun so that the sealant can flow out through the glue nozzle! Please be careful not to press the switch of the glue gun, gently press it bit by bit, so that the sealant will flow evenly out!
胶枪在生活中的应用,相信大家都不陌生,比如房子的门漏水,用胶枪密封胶,漏水问题就解决了,今天我就来介绍一下胶水的具体使用方法一步步拿枪!
方法/步骤
1.准备好工具和设备:一把螺丝刀、一瓶密封剂和一把胶枪。
2.用螺丝刀将密封胶尖轻轻插入小口中,使密封胶流出。
3.用一字螺丝刀将密封胶橡胶尾部的小铁盖插入一个小口,然后轻轻取下小盖,如图2所示。
4.通过密封剂头上的螺纹,将喷嘴在密封剂头上顺时针旋转。
5.将胶枪的黑色固定环置于胶枪的最末端,以便密封剂能顺利插入胶枪。
6.一手按住胶枪小弹簧,另一只手将胶枪延长臂调整到最大。这样做的目的是为了让密封胶能够全部进入胶枪内部。
7.将胶枪从尾部一点一点地插入,当只露出胶尖时,说明整个密封胶已插入胶枪中。
8.将胶枪黑色固定环套在胶枪头上。这样做的目的是为了将密封胶固定在胶枪内部,防止胶枪使用过程中密封胶从胶枪中逸出。
9.再次按住胶枪末端的小弹簧,用另一只手将胶枪的伸出臂向前推,直到推不动为止。
10.按住胶枪开关,让密封胶从胶嘴流出!请注意不要按下胶枪的开关,轻轻一点一点地按下,这样密封胶就会均匀地流出!
The application of the glue gun in life, I believe that everyone is no stranger, such as the door leak of the house, with the glue gun sealant, the water leakage problem will be solved, today I will introduce the specific use of the glue gun step by step!
Methods/Steps
1.Get your tools and equipment, a screwdriver, a bottle of sealant, and a glue gun.
2.Use a screwdriver to gently insert the sealant tip into a small opening so that the sealant can flow out.
3.Insert a small opening into the small iron cover of the rubber tail of the sealant with a word screwdriver, and then gently remove the small cover, as shown in Figure 2.
4. Through the thread of the sealant head, twist the nozzle clockwise on the sealant head.
5.Place the black fixing ring of the glue gun at the very end of the glue gun, so that the sealant can be inserted into the glue gun smoothly.
6.One hand holds down the small spring of the glue gun, and the other hand adjusts the extension arm of the glue gun to the maximum. The purpose of doing this is to make the sealant can all enter the inside of the glue gun.
7.Insert the glue gun from the tail, bit by bit, and when only the glue tip is exposed, it means that the entire sealant has been inserted into the glue gun.
8.Put the black fixing ring of the glue gun on the head of the glue gun. The purpose of doing this is to fix the sealant inside the glue gun and prevent the sealant from escaping the glue gun during the use of the glue gun.
8.Put the black fixing ring of the glue gun on the head of the glue gun. The purpose of doing this is to fix the sealant inside the glue gun and prevent the sealant from escaping the glue gun during the use of the glue gun.
9.Hold down the small spring at the end of the glue gun again, and push the extended arm of the glue gun forward with your other hand until you can’t push it anymore.
10.Press and hold the switch of the glue gun so that the sealant can flow out through the glue nozzle! Please be careful not to press the switch of the glue gun, gently press it bit by bit, so that the sealant will flow evenly out!
No Comments